


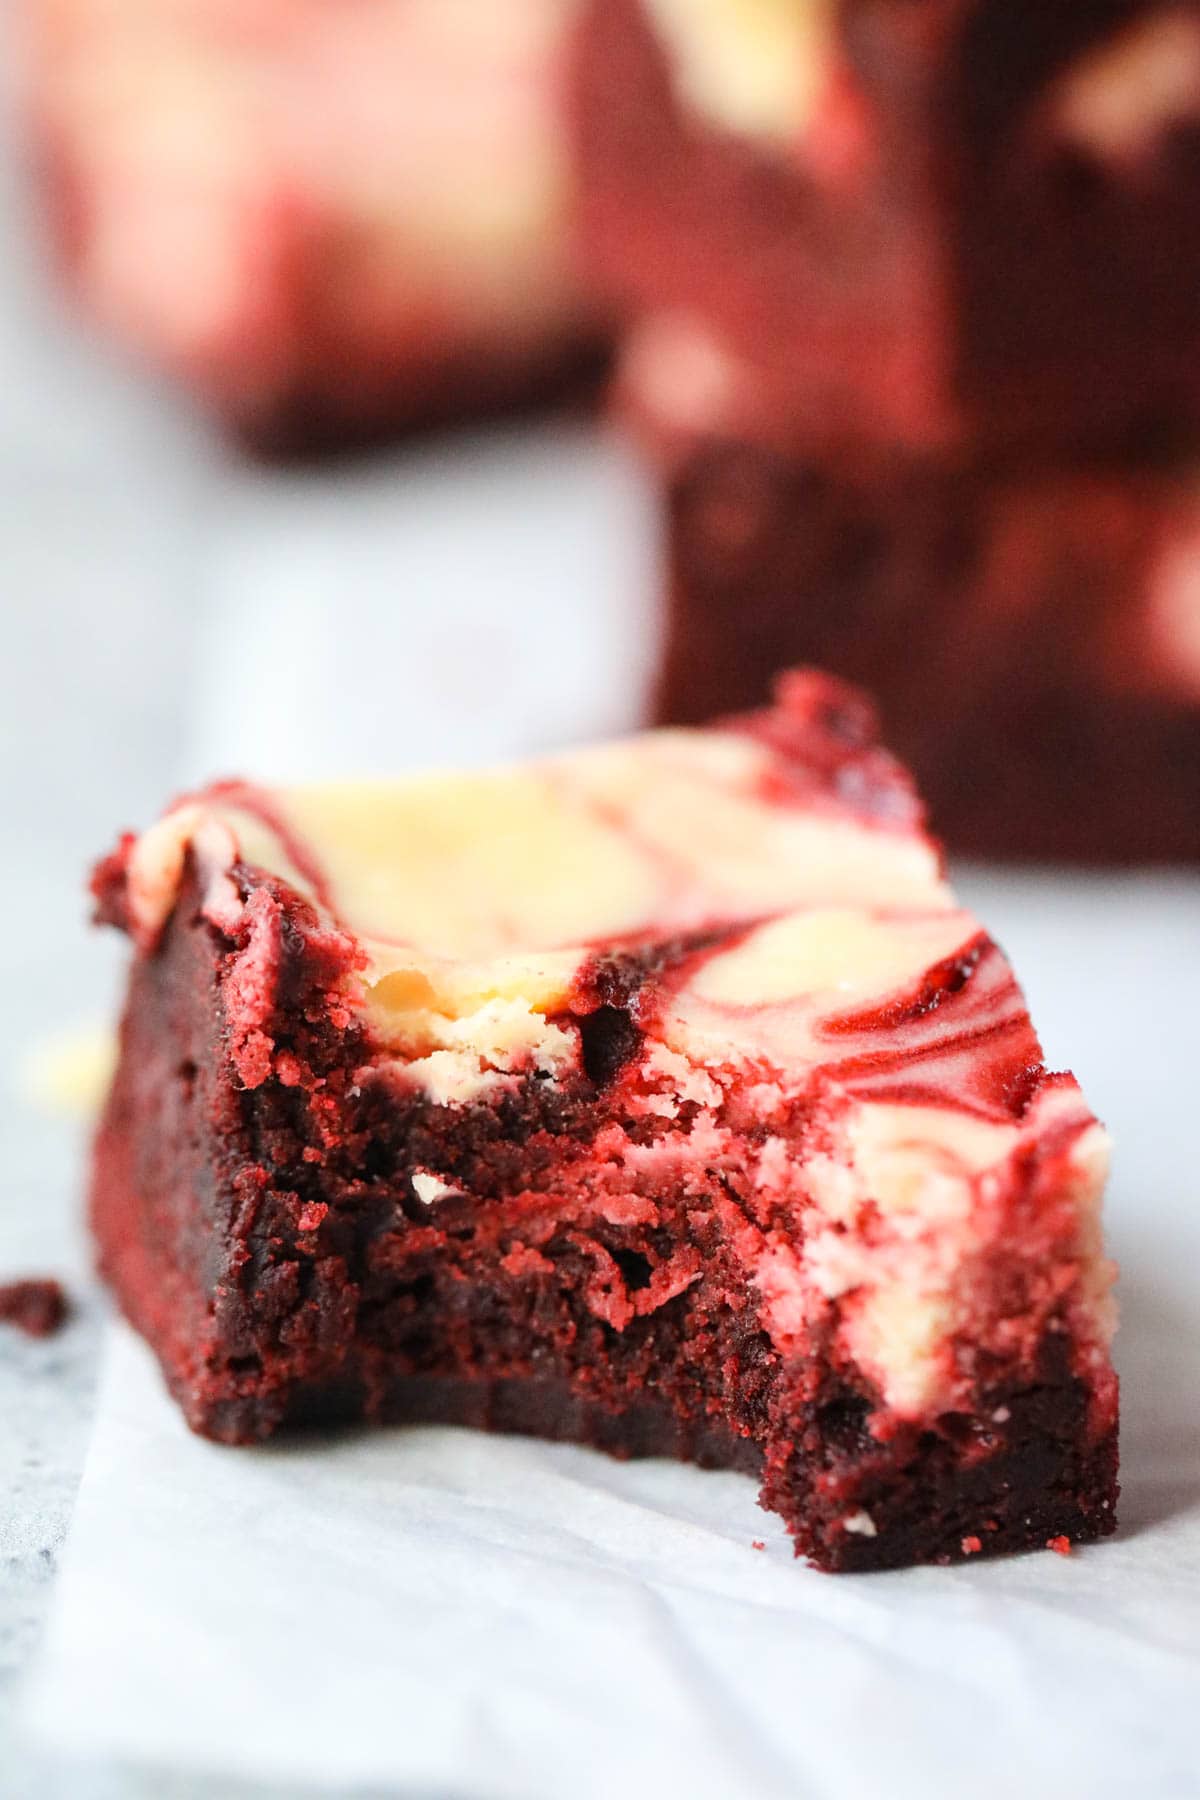
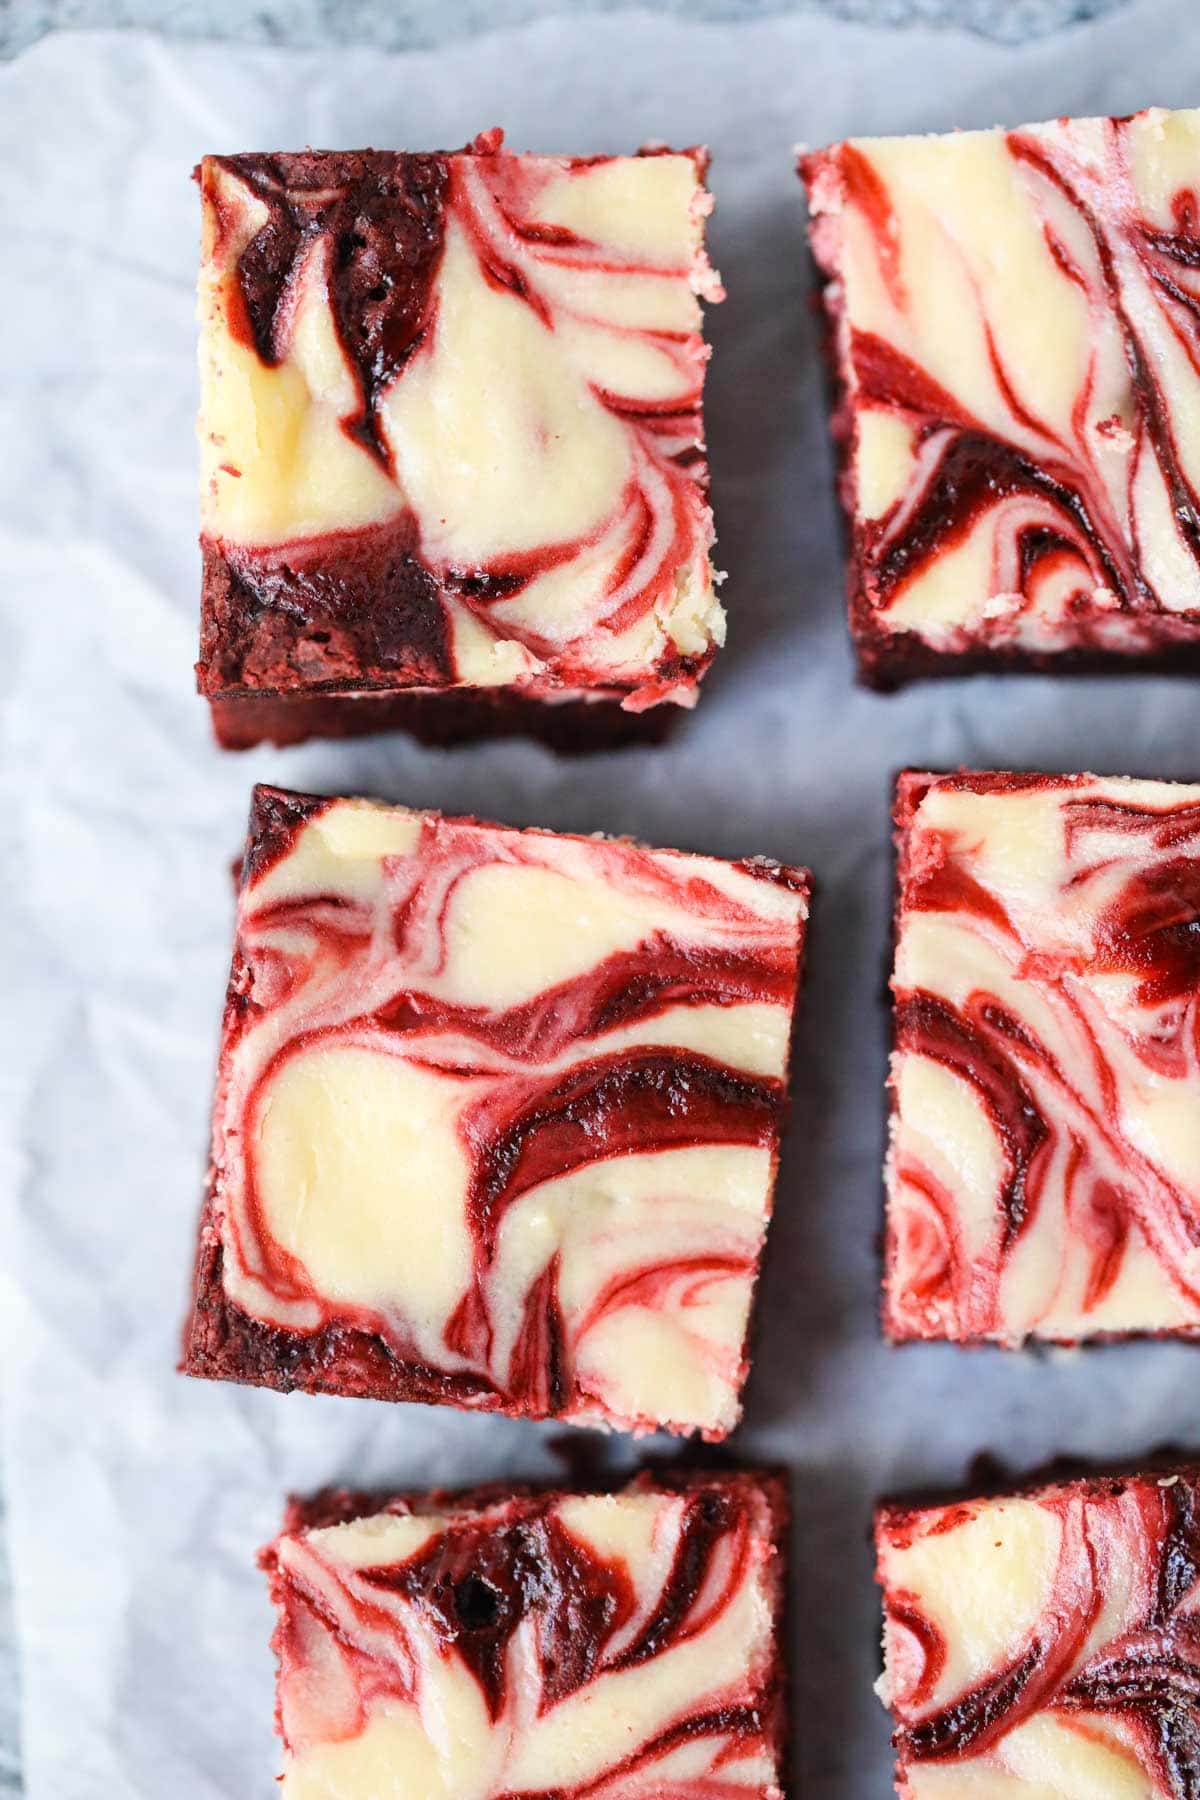
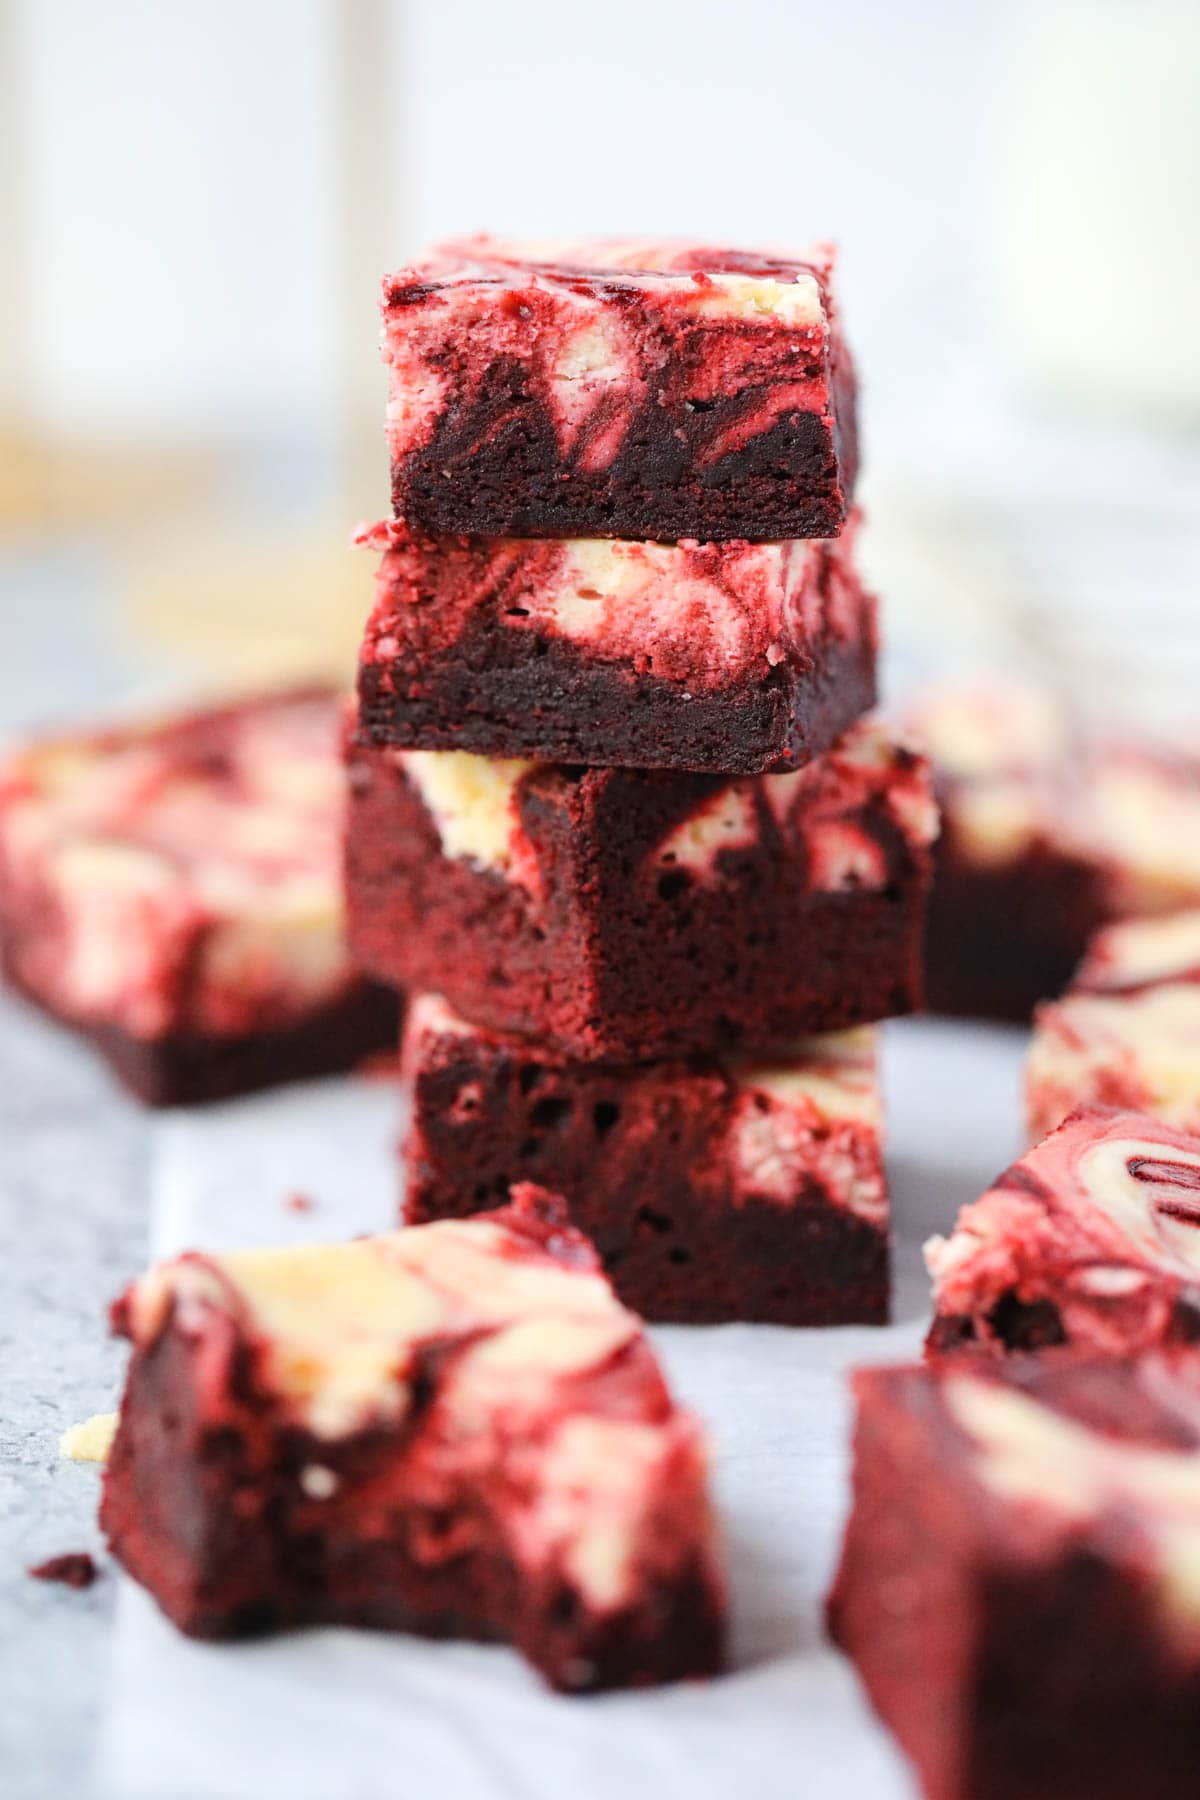
These chewy, fudgy red velvet cheesecake brownies with swirls of brownie batter and smooth, creamy cheesecake are the perfect indulgent treat. These decadent brownies are the perfect mashup of chocolatey, sweet, and tangy flavors!
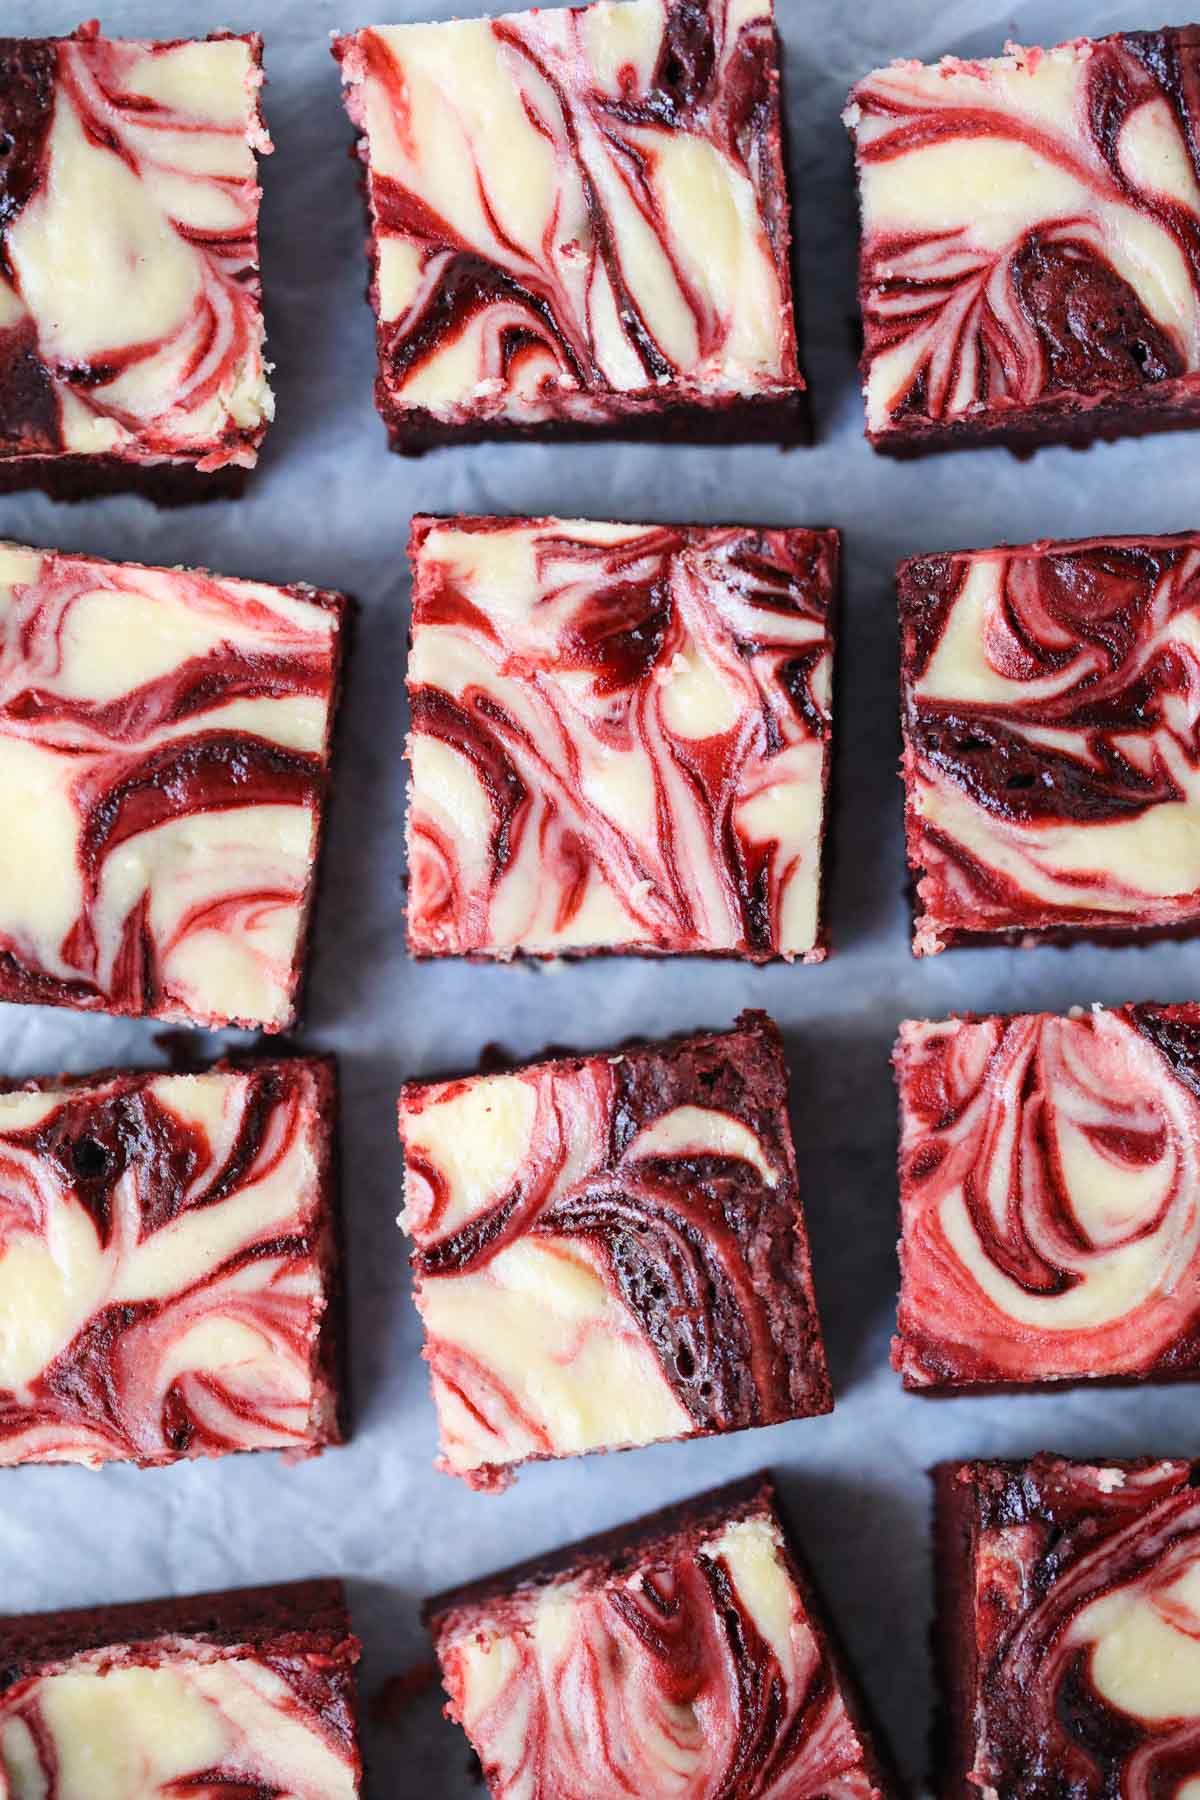
If you are looking for a decadent, impressive dessert that does not require a ton of effort, look no further than these red velvet cheesecake brownies! Rich, chocolatey red velvet brownie batter is layered with sweet and tangy cheesecake batter to create an epic mashup of a dessert.
Red velvet cheesecake brownies are the perfect addition to your holiday dessert table. I love to serve them alongside festive cookies, freshly baked cakes, and homemade candies!
For more irresistible desserts, check out our Pecan Pie Cheesecake Bars and The Best Bread Pudding recipes next!
Table of Contents
- Why You Will Love These Red Velvet Brownies
- Ingredients You Need To Make This Recipe
- How To Make Red Velvet Cheesecake Brownies
- Variations and Substitutions
- Is Red Velvet Just Chocolate with Red Food Coloring Added?
- More FAQs
- Recommended Kitchen Tools For This Recipe
- More Irresistible Desserts You Will Love!
- 📖 Recipe
Why You Will Love These Red Velvet Brownies
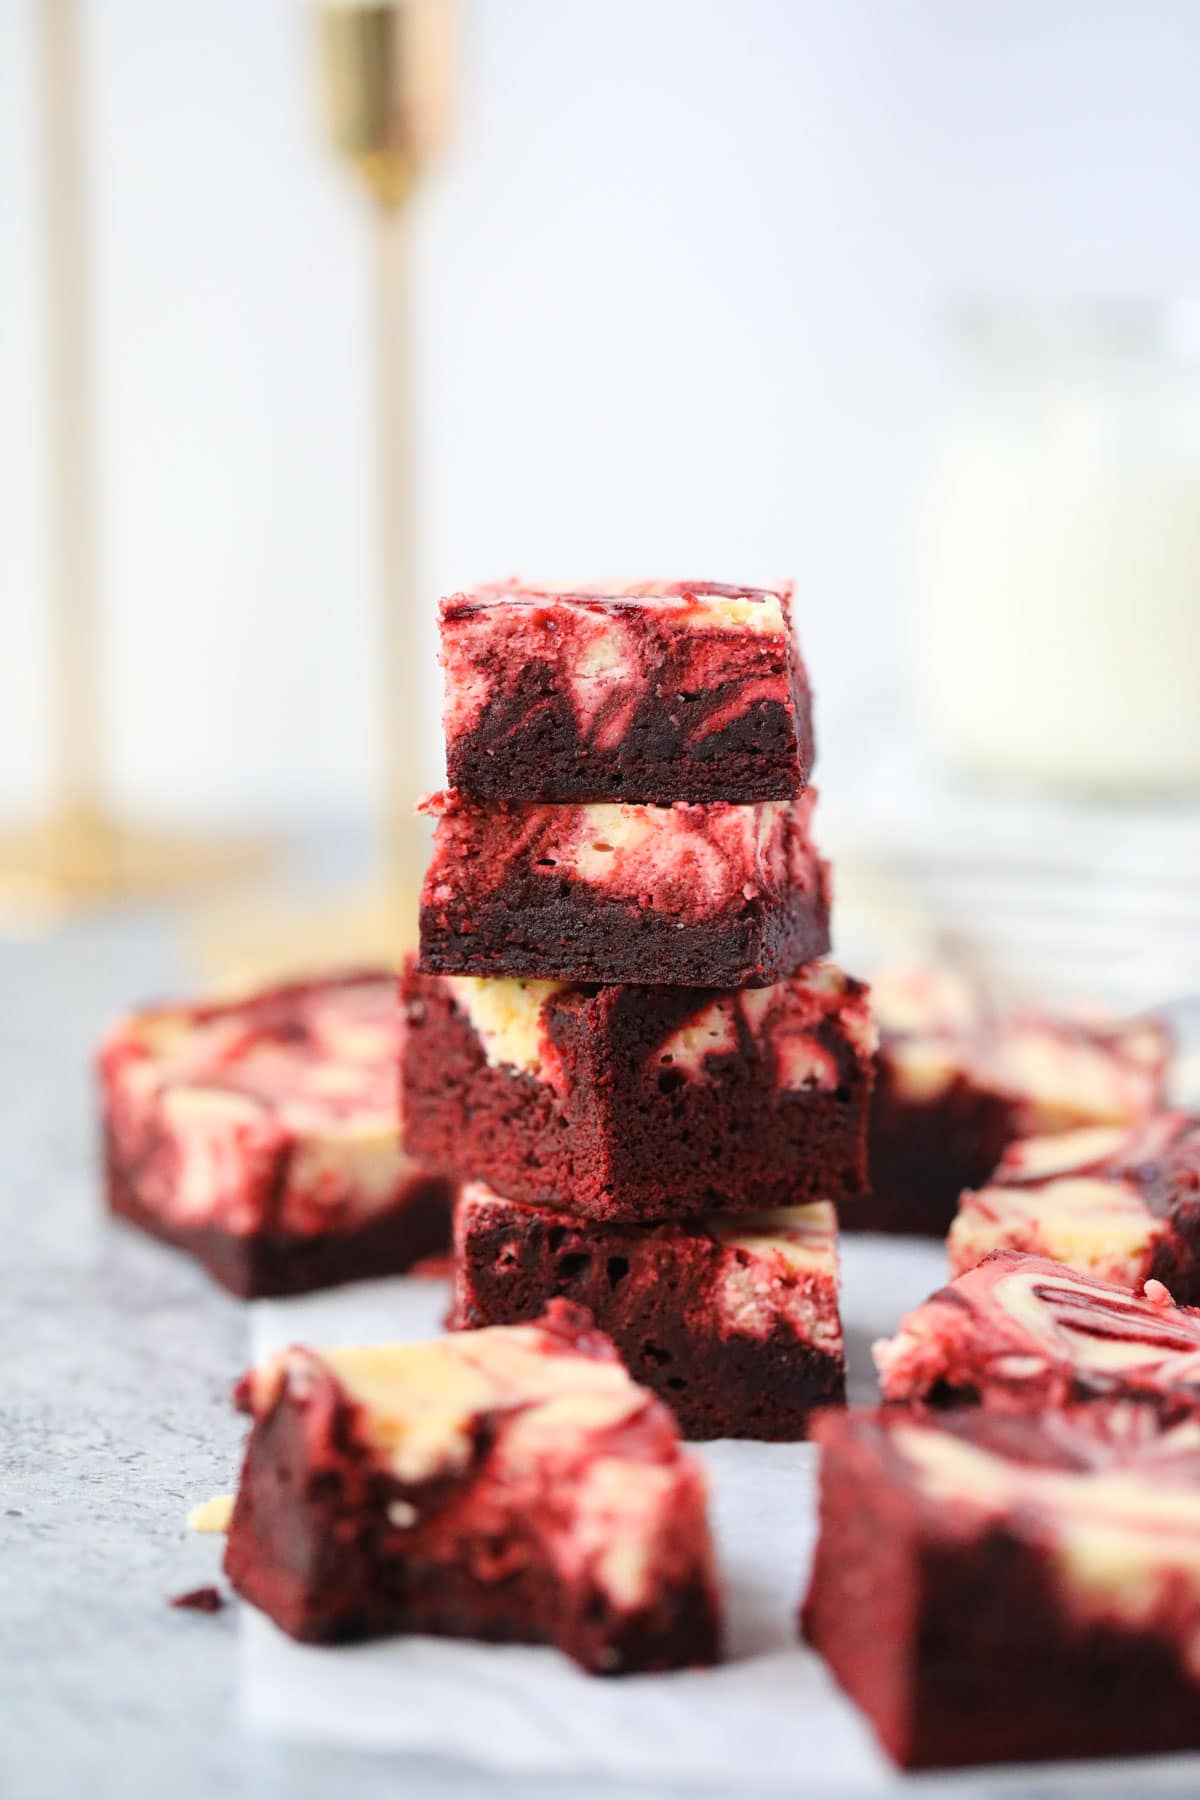
- A delicious showstopping dessert! The beautiful red velvet brownie batter swirled with the rich, creamy cheesecake creates an eye-catching dessert that is sure to impress your guests.
- Incredible flavors! The brownie batter is rich and chocolaty and the cheesecake is creamy, sweet, and tangy. The flavors pair amazingly well and will keep you coming back for more.
- They are surprisingly easy to make! Red velvet cheesecake brownies come together in just a few, simple steps, making them a crowd-pleaser.
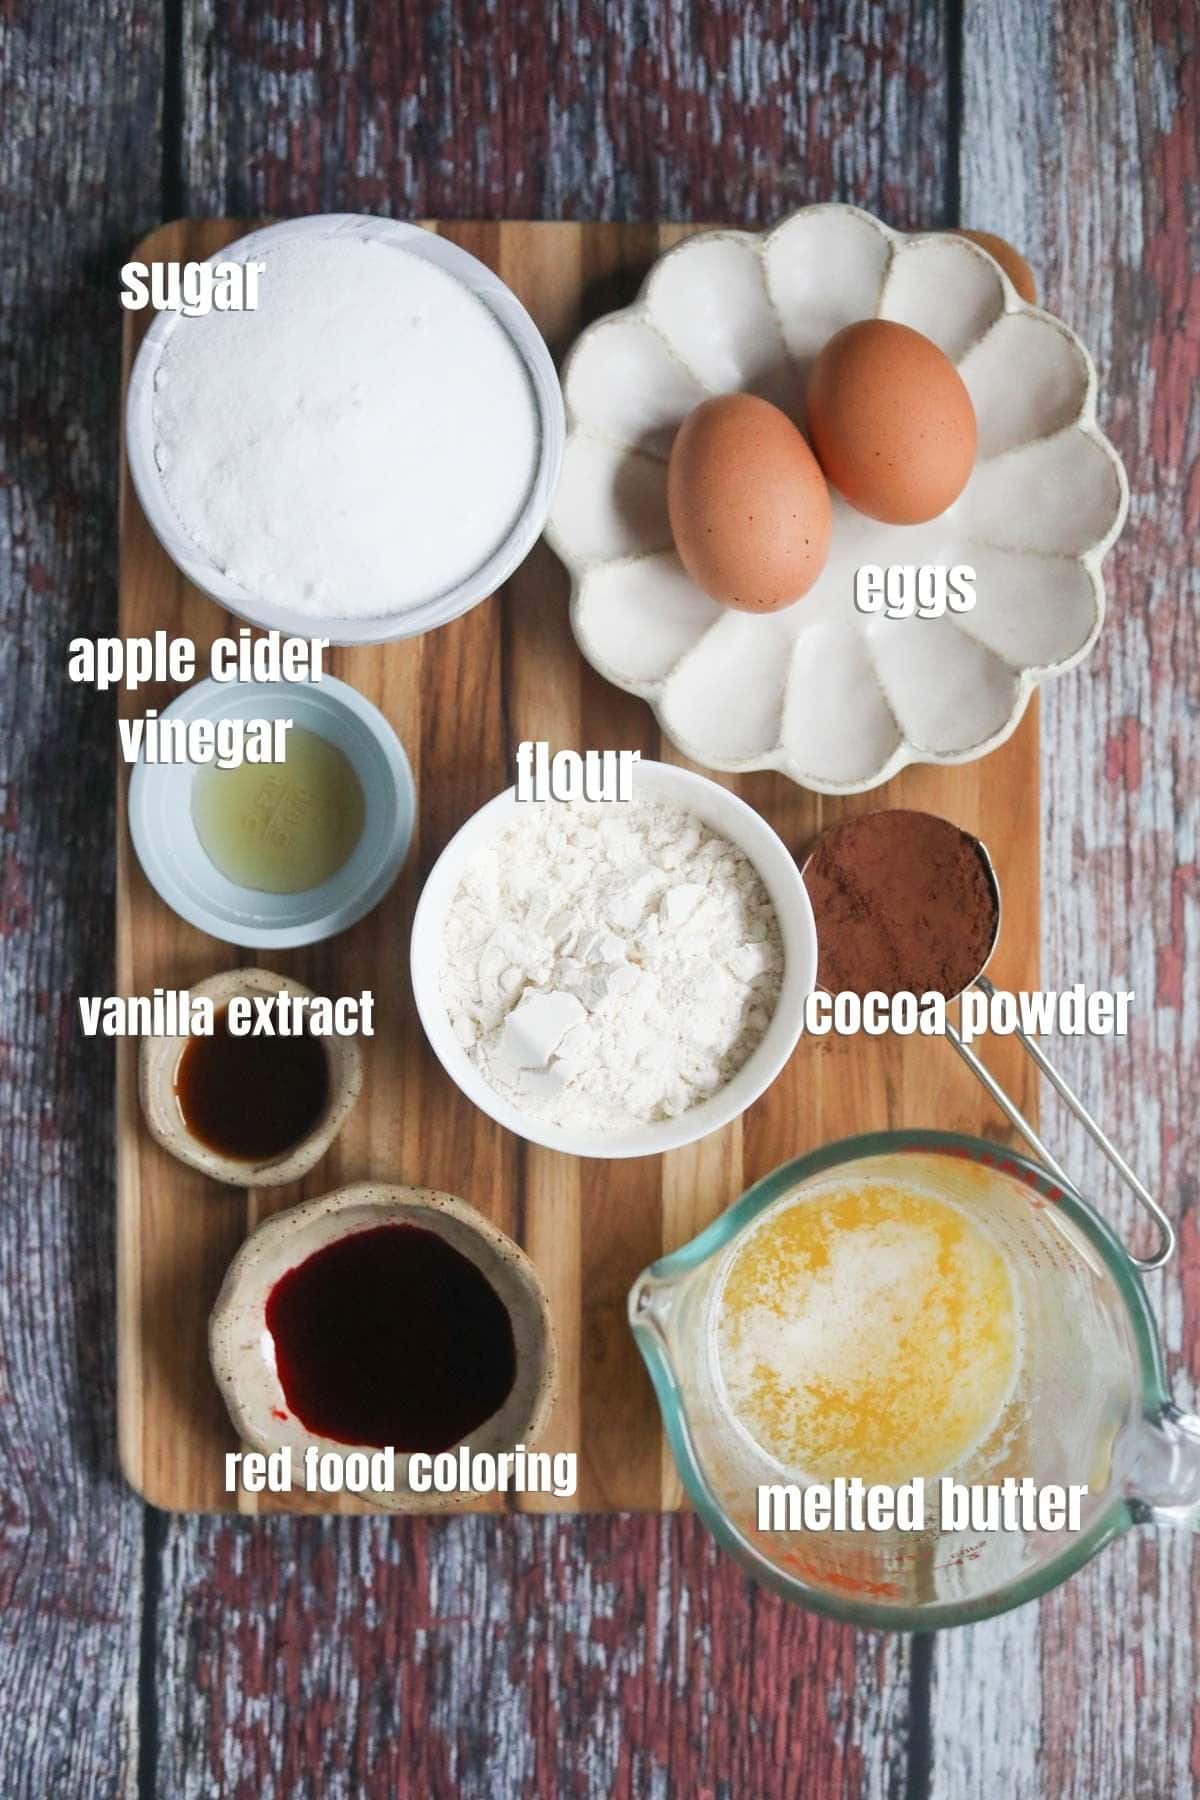
Ingredients You Need To Make This Recipe
A complete list of ingredients with measurements along with detailed recipe instructions can be found in the recipe card located at the bottom of this post.
Red Velvet Brownie Layer
- Melted butter. Mixed with the sugar to create the base for the brownie batter. I use unsalted butter but salted also works. Just omit any additional salt.
- Granulated sugar. To sweeten the brownies.
- Eggs. Room-temperature eggs are beaten with sugar and butter to give the brownies the perfect texture. The longer you beat the eggs, the more of a crackly top your brownies will have.
- Vanilla extract. For flavor and depth. Use good-quality vanilla for the best flavor!
- Dutch-processed cocoa powder. To add rich cocoa flavor that is less bitter than regular cocoa powder. I use Hershey's Special Dark. Regular cocoa powder can also be used. Just note that the brownies will have a lighter color.
- Salt. To enhance the flavors of the other ingredients.
- Red food coloring. To create the beautiful red velvet color!
- Apple cider vinegar. This is a key ingredient in the brownies that give them their signature red velvet flavor.
- All-purpose flour. For soft and chewy brownies. Measure your flour properly by spooning and leveling.
Cheesecake Layer
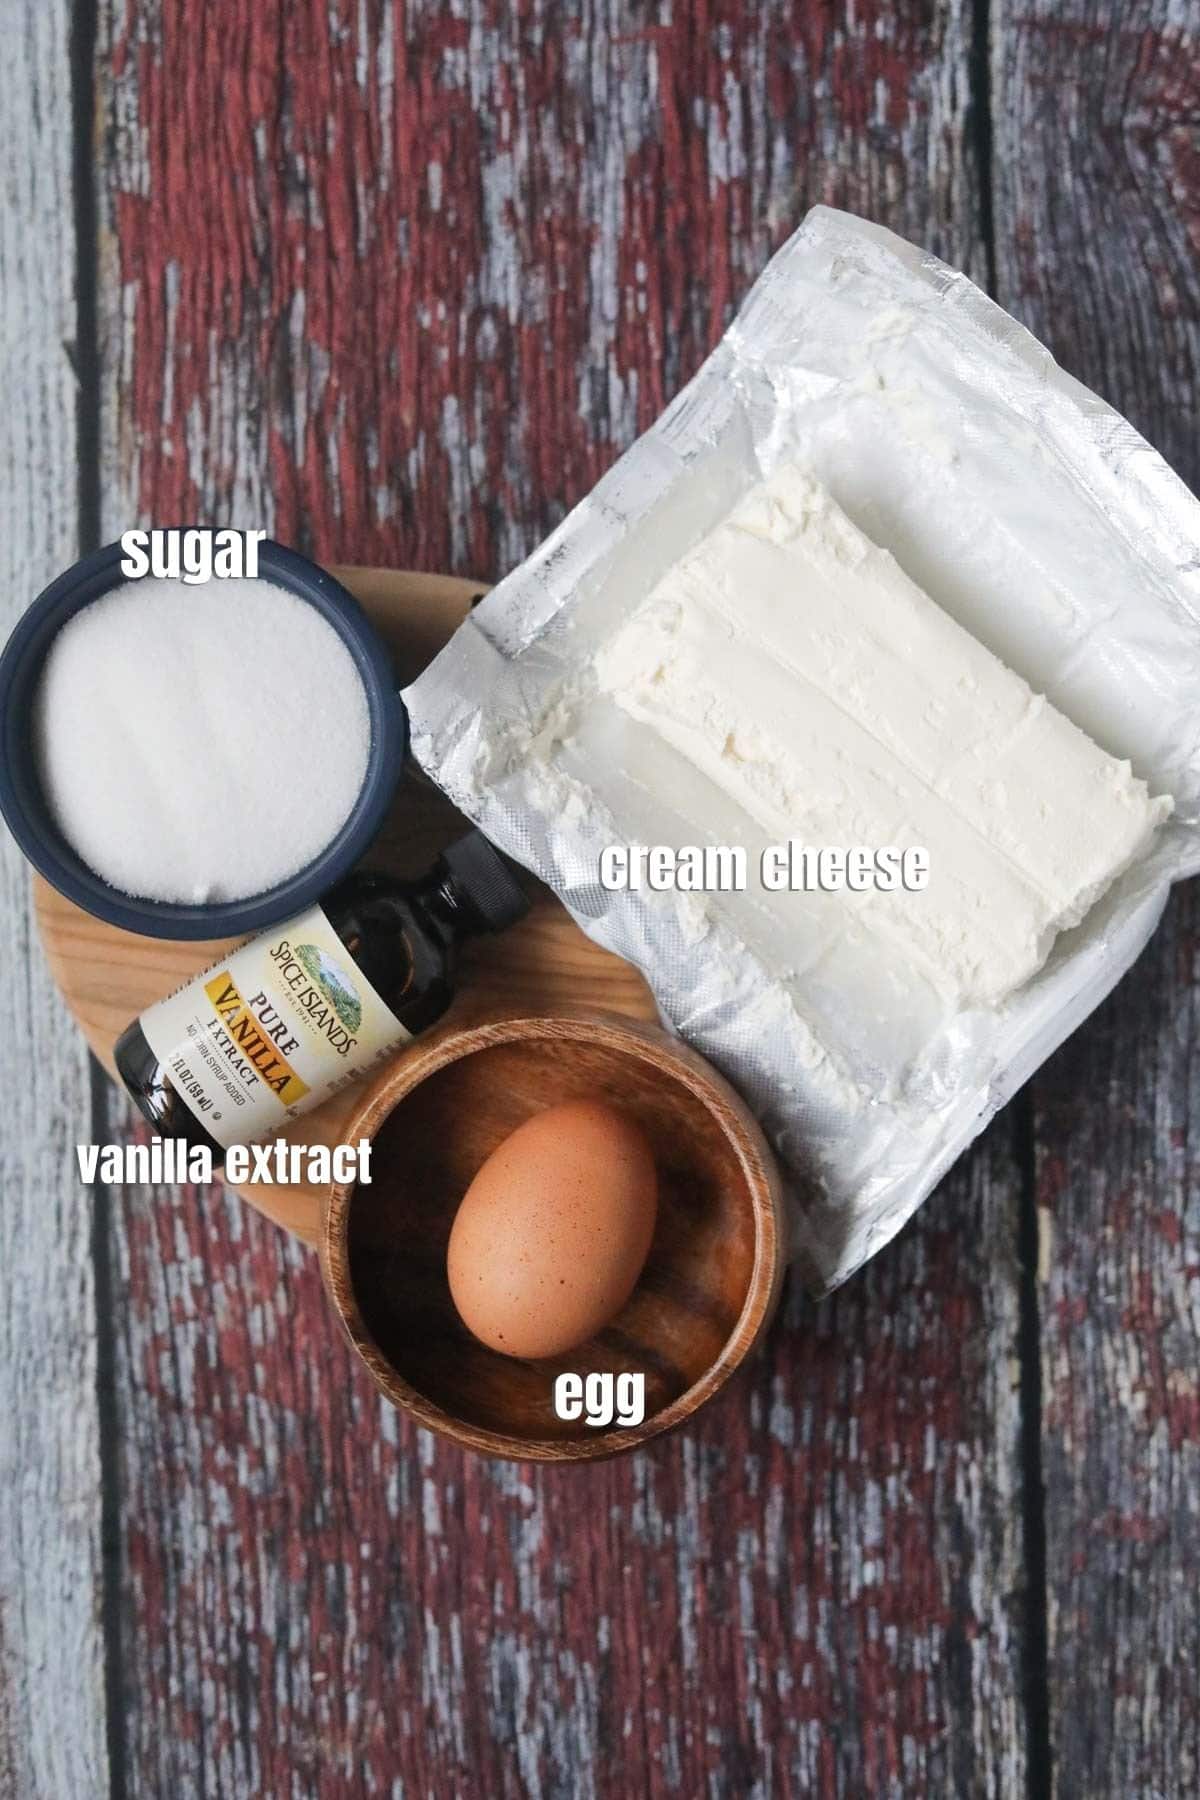
- Cream cheese. For that signature sure tangy cheesecake flavor. Make sure your cream cheese is at room temperature.
- Egg. To bind the ingredients and give the cheesecake the perfect texture.
- Granulated sugar. To sweeten the cheesecake batter.
- Vanilla extract. For extra flavor and depth. Use good-quality vanilla extract!
How To Make Red Velvet Cheesecake Brownies
- Preheat your oven to 350°F. Line an 8 x 8" baking pan with parchment paper and set it aside.
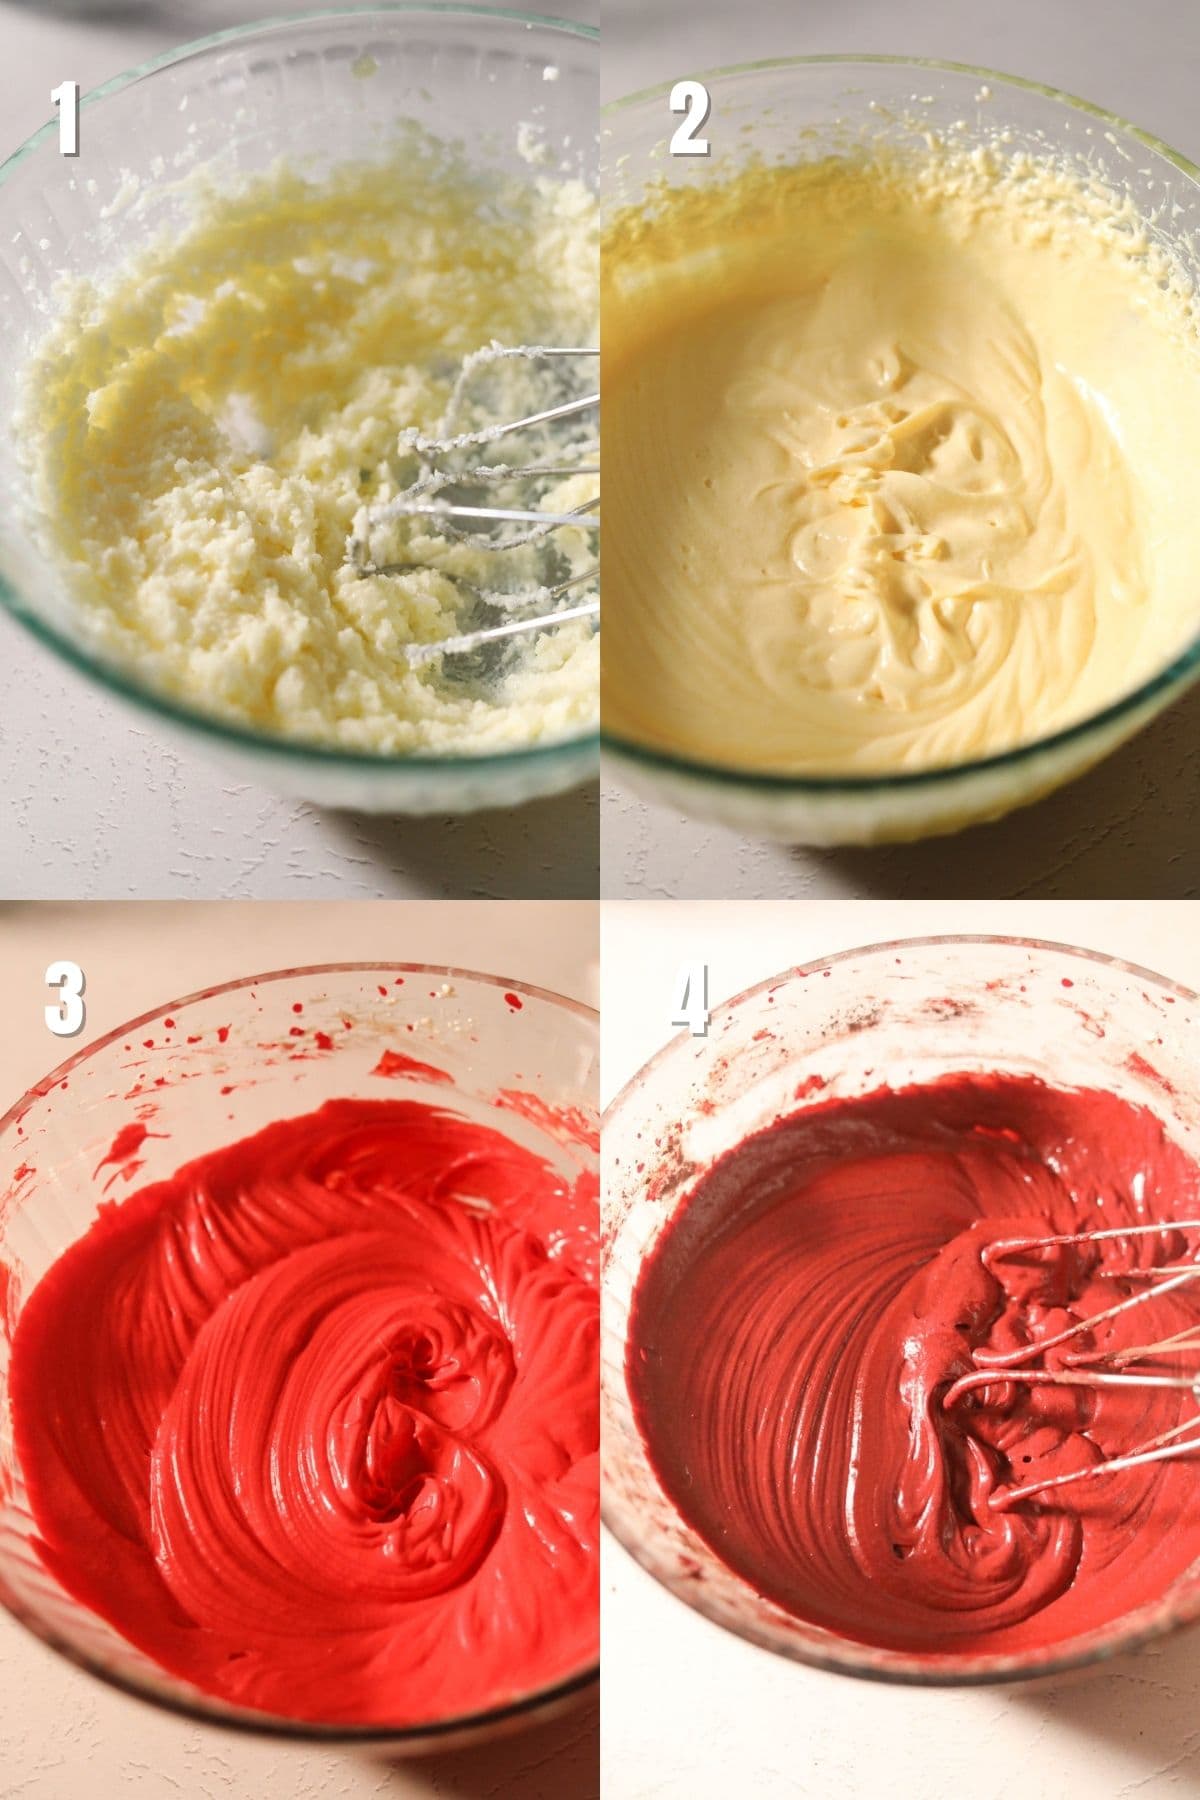
- In a medium mixing bowl, beat together the melted butter and sugar with an electric handheld mixer until light and fluffy. This should take about 2 to 3 minutes.
- Add the eggs to the bowl and beat with the mixer until the mixture is slightly foamy and small bubbles start to appear. This should take about 3 to 4 minutes.
- Add the cocoa powder, red food coloring, vanilla extract, apple cider vinegar, and salt and mix on medium until the ingredients are well combined.
- Scrape down the bowl, add the flour, and mix on medium until no more streaks of dry flour are visible. Do not overmix the batter.
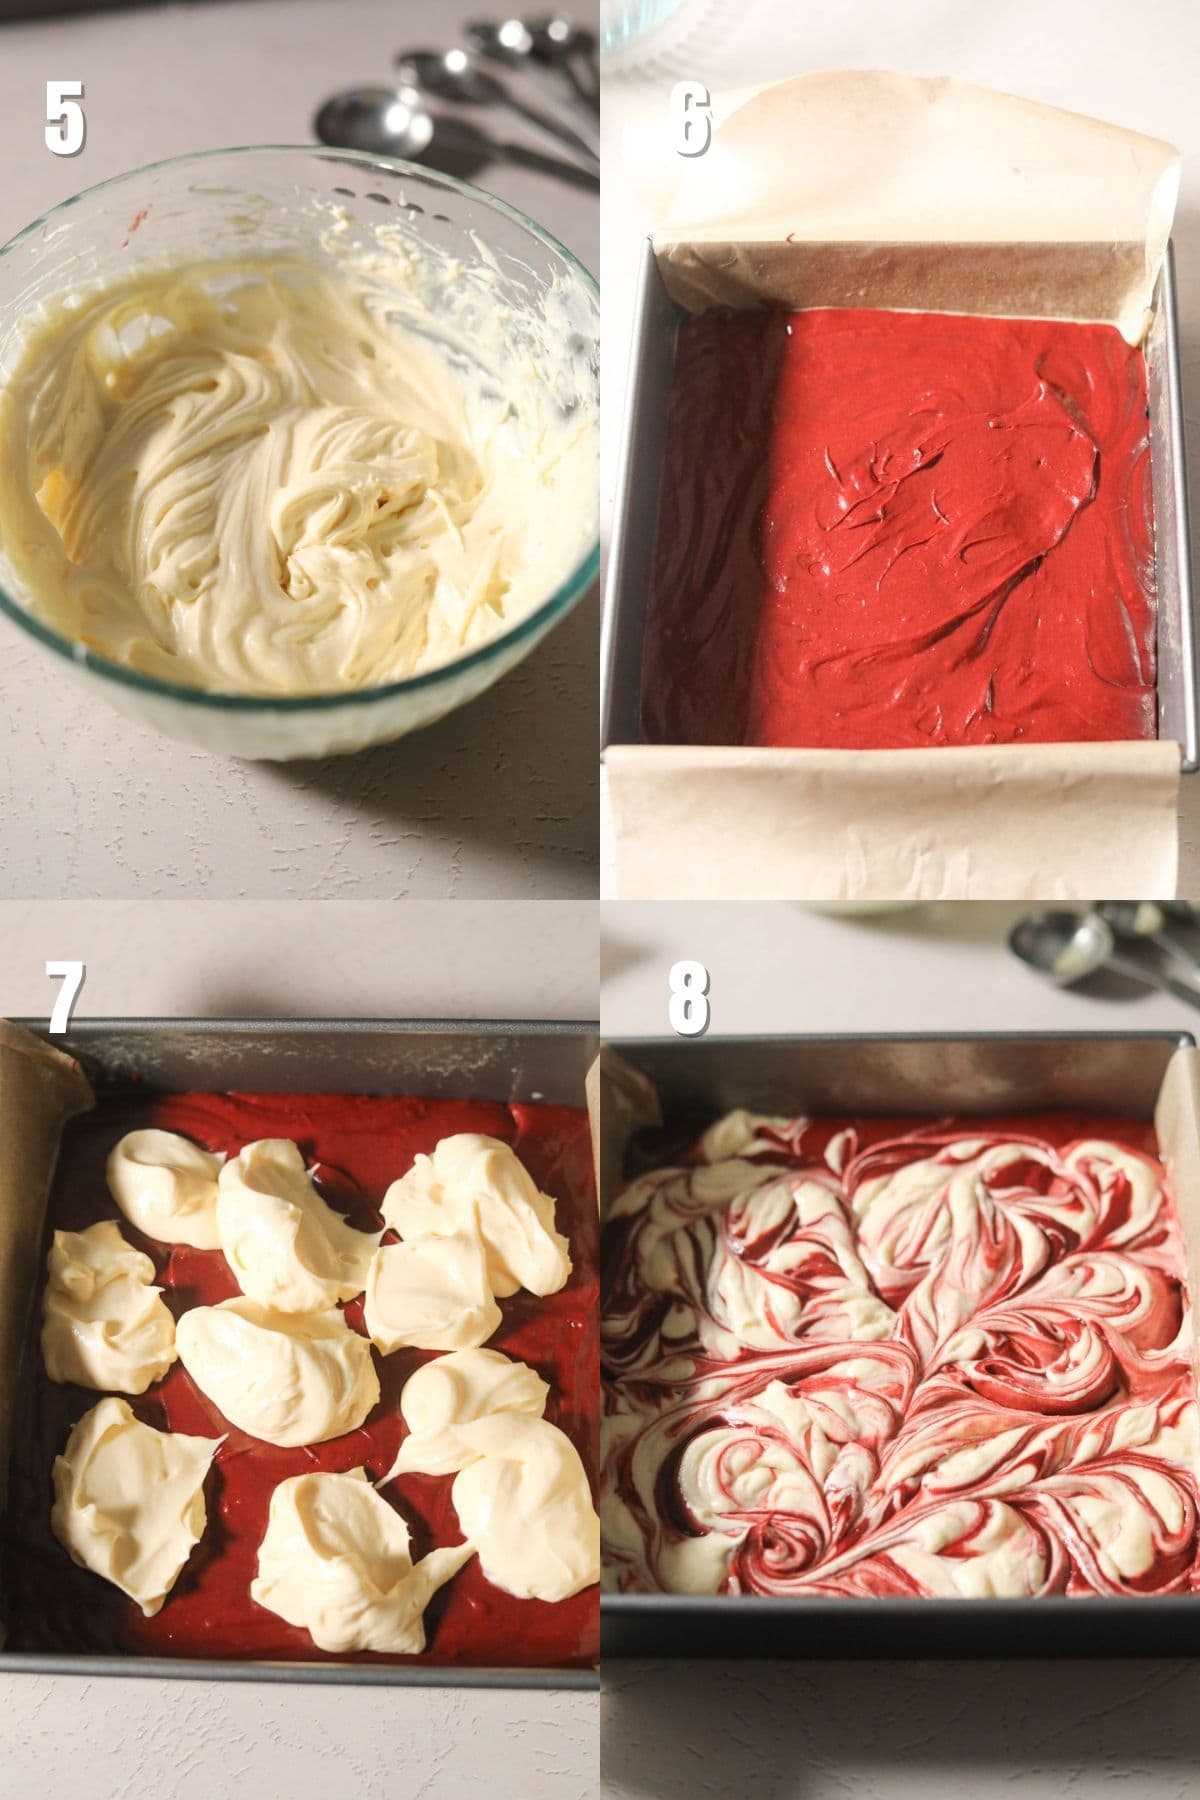
- Pour the brownie batter into the prepared baking pan and smooth it out into an even layer. Set the pan aside while you mix the cheesecake batter.
- Add the softened cream cheese, egg, granulated sugar, and vanilla extract to a medium mixing bowl and beat with the handheld mixer until smooth and creamy.
- Using a spoon, drop dollops of cheesecake batter on top of the brownie batter. Use a butter knife to swirl the cheesecake and brownie batters together.
- Bake the brownies in the preheated oven for 25 to 30 minutes. Check the brownies by inserting a toothpick into the center. If the toothpick comes out with a few moist crumbs, the brownies are done.
Variations and Substitutions
- Regular cocoa powder can be used instead of Dutch-processed cocoa powder. The flavor of regular cocoa powder is slightly more bitter and the brownies will have a lighter, more vibrant red color. The flavors will still be delicious!
- You may use a natural red food coloring instead of a traditional red food color if you are avoiding artificial ingredients. Your brownies may have a less vibrant color depending on the food coloring you use.
- You may also omit the red food coloring entirely if you like. The flavor of the brownies will not change.
Is Red Velvet Just Chocolate with Red Food Coloring Added?
While red velvet flavor is very similar to the traditional chocolate flavor, there are some differences.
Red velvet flavor calls for less cocoa powder than traditional chocolate flavor, and of course, the red food coloring is added for the signature red color.
More FAQs
The signature crackly tart that brownies are known for comes from how well the eggs are beaten into the butter and sugar. If you beat the eggs with the butter and sugar until they are slightly foamy, you will get a beautiful crackly top.
If your brownies turn out spongy instead of chewy and fudgy, you most likely over-baked them. Take your brownies out of the oven before the center is completely set to get the perfect fudgy texture.
Most brownies can be stored in an airtight container at room temperature for up to 3 days however because these brownies have a cheesecake layer, they need to be kept in the refrigerator and can be stored for up to 5 days.
Yes! Leftover red velvet cheesecake brownies can be frozen for up to three months. Place the brownies on a sheet pan in a single layer and place the pan in the freezer until the brownies are frozen solid. Then transfer the brownies to a zip-top freezer bag for storage.
Recommended Kitchen Tools For This Recipe
- Mixing bowls
- Electric handheld mixer
- Measuring cups and spoons
- 8 x 8" baking pan
- Silicone spatula

More Irresistible Desserts You Will Love!
- Kitchen Sink Cookies
- Cinnamon Roll Cookies
- Best Southern Pecan Pralines
- Southern Buttermilk Pie
- New Orleans Beignets
- Red Velvet Cheesecake Cake
- Chocolate Chess Pie
- Moist Lemon Bundt Cake
- Sock It To Me Cake
- Chocolate Gravy
- Skillet Peach Cobbler
- Fresh Strawberry Cobbler
- Old Fashioned Banana Pudding
- Bananas Foster French Toast
📖 Recipe
Red Velvet Cheesecake Brownies
Ingredients
Red Velvet Brownie Layer
- ½ cup unsalted butter - melted
- 1 cup granulated sugar
- 2 large eggs - room temperature
- ¼ cup dutch-processed cocoa powder - or regular unsweetned cocoa powder
- 3 teaspoons red food coloring
- 2 teaspoons vanilla extract
- 1 teaspoon apple cider vinegar
- ½ teaspoon salt
- ¾ cup all-purpose flour - spooned and leveled
Cheesecake Layer
- 8 ounces cream cheese - softened to room temperature
- 1 large egg - room temperature
- ⅓ cup granulated sugar
- ¼ teaspoon vanilla extract
Instructions
- Preheat your oven to 350°F. Line an 8 x 8" baking pan with parchment paper and set it aside.
- In a medium mixing bowl, beat together the melted butter and sugar with an electric handheld mixer until light and fluffy. This should take about 2 to 3 minutes.
- Add the eggs to the bowl and beat with the mixer until the mixture is slightly foamy and small bubbles start to appear. This should take about 3 to 4 minutes.
- Add the cocoa powder, red food coloring, vanilla extract, apple cider vinegar, and salt and mix on medium until the ingredients are well combined.
- Scrape down the bowl, add the flour, and mix on medium until no more streaks of dry flour are visible. Do not overmix the batter.
- Pour the brownie batter into the prepared baking pan and smooth it out into an even layer. Set the pan aside while you mix the cheesecake batter.
- Add the softened cream cheese, egg, granulated sugar, and vanilla extract to a medium mixing bowl and beat with the handheld mixer until smooth and creamy.
- Using a spoon, drop dollops of cheesecake batter on top of the brownie batter. Use a butter knife to swirl the cheesecake and brownie batters together.
- Bake the brownies in the preheated oven for 25 to 30 minutes. Check the brownies by inserting a toothpick into the center. If the toothpick comes out with a few moist crumbs, the brownies are done.
Notes
- If you use regular unsweetened cocoa powder, the chocolate flavor will not be as rich and the brownies will have a lighter, more vibrant red color.
- You may use a natural red food coloring instead of traditional red food color if you are avoiding artificial ingredients. Your brownies may have a less vibrant color depending on the food coloring you use.
- Leftover red velvet cheesecake brownies can be stored in an airtight container in the refrigerator for up to 5 days.


CARON P ROBINSON
Moist and delicious!
Ashley Boyd
I'm so happy you enjoyed them!
Jermeria Skillom
I can't wait to try this and give an update! They look absolutely amazing!
Ashley Boyd
I can't wait to hear how they turn out! Thank you!
Linda Peggs
Look delicious!!! I will try recipe ❤️
Ashley Boyd
Thank you and I hope you love the brownies!
Grenda R Poole
I think I'm going to try this.
Ashley Boyd
I hope you love them!
Marlon Boyd
These were amazing! I will def make these for my family when they come in town again!
Ashley Boyd
I'm so happy you loved the brownies!
Kirby Boyd
Love this recipe! So easy to follow and the outcome was phenomenal
Ashley Boyd
Thank you for trying the recipe, Kirby! I'm happy you loved the brownies.